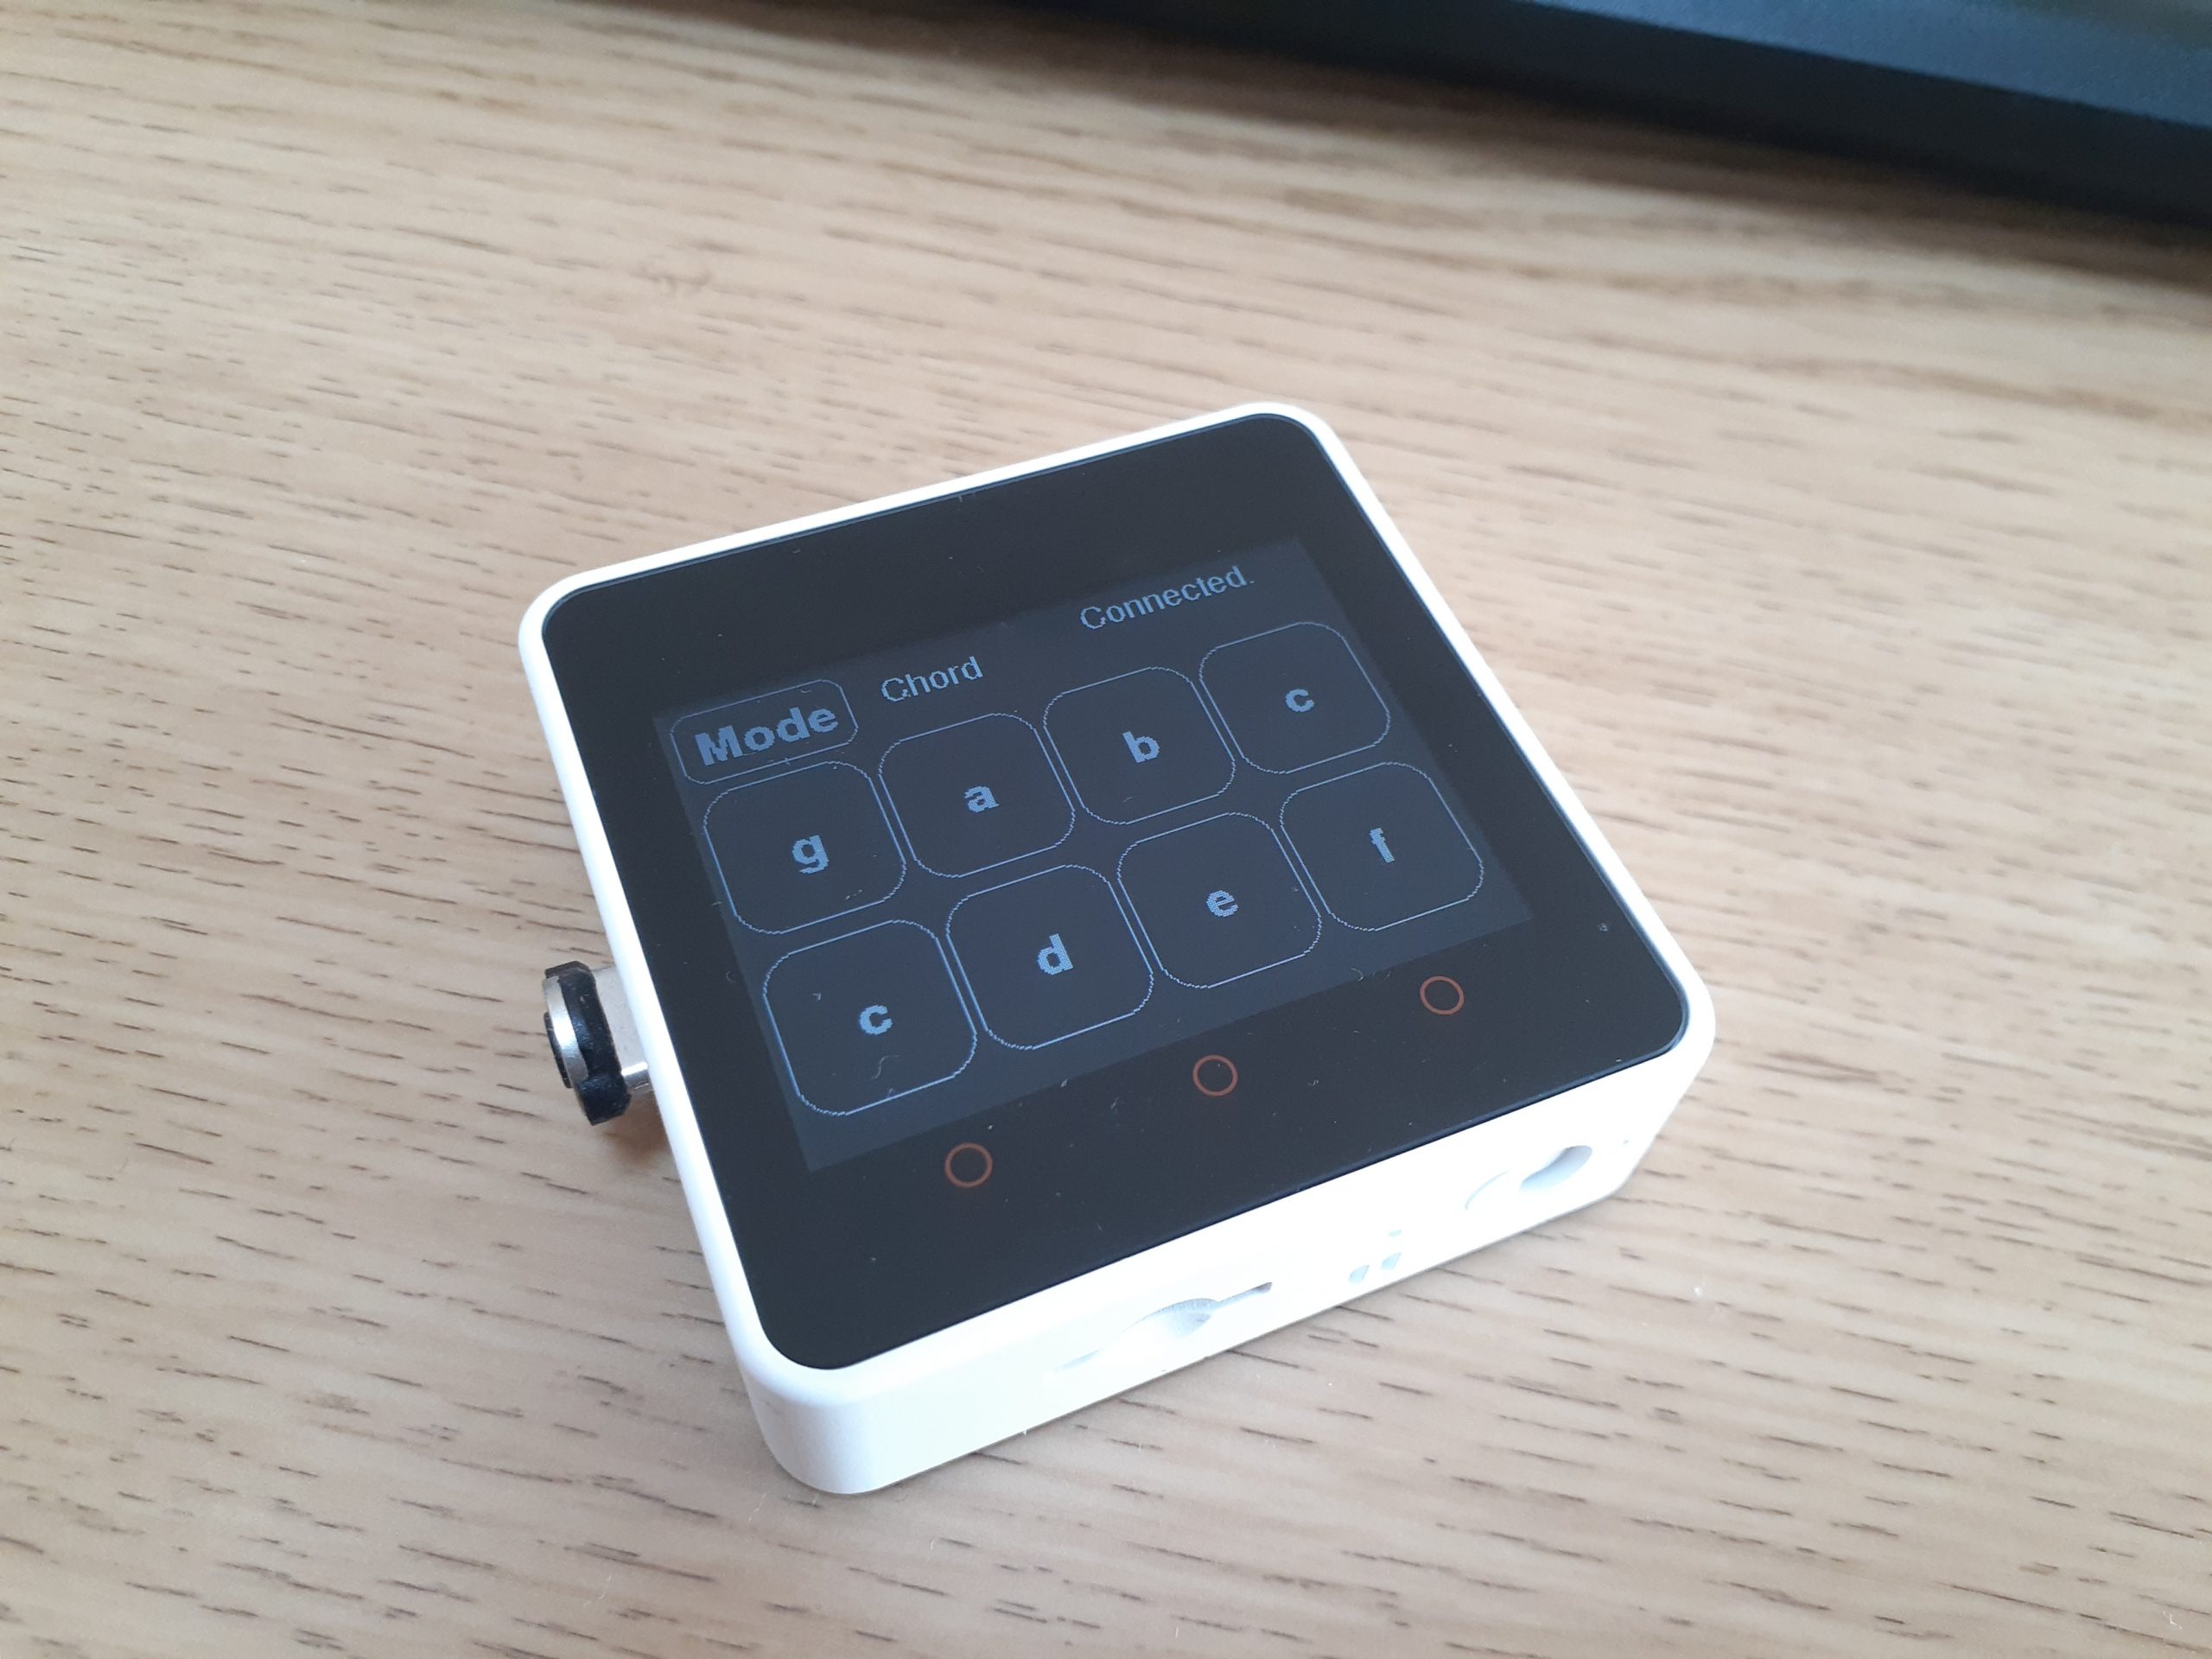
触り始め。とりあえず、画面のボタンを押すとMIDIノートを送信。モード切り替えでコードも送る。今のところ、Cのメジャースケールのみ。切り替えはあとで考える。
BluetoothまわりはNimBLEを使用。コード見ればわかるんじゃないかな。わからないところをすっとばしてわかる範囲で作ったので、無駄なところだらけ。もっと効率化できると思うんだけど、知識不足。これからまとめる方向で。
あと、スクリーンボタンの反応が悪いのはなんでだろう。このへんもあとで調べよう。
/*
 * M5Stack Core 2 MIDI test 2021/12/29
 */

#include <M5Core2.h>
#include <BLEMIDI_Transport.h>


#include <hardware/BLEMIDI_ESP32_NimBLE.h>
#define DEVICE_NAME               "M5Core2 MIDI"
BLEMIDI_CREATE_INSTANCE(DEVICE_NAME, MIDI);

bool isConnected = false;
bool isChordMode = false;

ButtonColors cl_on  = {0x7BEF, WHITE, WHITE}; // タップした時の色 (背景, 文字列, ボーダー)
ButtonColors cl_off = {BLACK, 0xC618, 0xC618}; // 指を離した時の色 (背景, 文字列, ボーダー)

// ボタン定義名( X軸, Y軸, 横幅, 高さ, 回転, ボタンのラベル, 指を離した時の色指定, タッチした時の色指定)
Button btn_g(  0,  50, 76, 80, false ,"g", cl_off, cl_on);
Button btn_a( 80,  50, 76, 80, false ,"a", cl_off, cl_on);
Button btn_b(160,  50, 76, 80, false ,"b", cl_off, cl_on);
Button btn_C(240,  50, 76, 80, false ,"c", cl_off, cl_on);

Button btn_c(  0, 140, 76, 80, false ,"c", cl_off, cl_on);
Button btn_d( 80, 140, 76, 80, false ,"d", cl_off, cl_on);
Button btn_e(160, 140, 76, 80, false ,"e", cl_off, cl_on);
Button btn_f(240, 140, 76, 80, false ,"f", cl_off, cl_on);

Button btn_chord(0, 4, 80, 40, false ,"Mode", cl_off, cl_on);

void setup() {
  M5.begin();  //Init M5Core.
  M5.Lcd.setTextColor(YELLOW);  //Set the font color to yellow.
  M5.Lcd.setTextSize(2);  //Set the font size.

  //BLE-MIDI  ●
  MIDI.begin();
  //接続  ●
  BLEMIDI.setHandleConnected(OnConnected);
  BLEMIDI.setHandleDisconnected(OnDisconnected);

  Serial.print("start...");
  M5.Lcd.fillScreen(BLACK);
  M5.Buttons.setFont(FSSB12); // 全てのボタンのフォント指定
  //btn_c.setFont(FSSB24); // 個別指定したい場合はこちら

  btn_c.addHandler(event_btn_c, E_TOUCH + E_RELEASE); // ボタンのイベント関数を指定
  btn_d.addHandler(event_btn_d, E_TOUCH + E_RELEASE);
  btn_e.addHandler(event_btn_e, E_TOUCH + E_RELEASE);
  btn_f.addHandler(event_btn_f, E_TOUCH + E_RELEASE);
  btn_g.addHandler(event_btn_g, E_TOUCH + E_RELEASE);
  btn_a.addHandler(event_btn_a, E_TOUCH + E_RELEASE);
  btn_b.addHandler(event_btn_b, E_TOUCH + E_RELEASE);
  btn_C.addHandler(event_btn_C, E_TOUCH + E_RELEASE);
  btn_chord.addHandler(event_btn_chord, E_TOUCH + E_RELEASE);

  M5.Buttons.draw(); // 全てのボタンを描画

  // コードモード
  M5.Lcd.setTextColor(WHITE);
  M5.Lcd.setTextSize(1);
  M5.Lcd.drawString("Note", 120, 20, 1);
}

void loop() {
  M5.update();
}

//BLE-MIDI送信
void noteOn(uint8_t channel, uint8_t pitch, uint8_t velocity) {
  MIDI.sendNoteOn(pitch, velocity, 1);
}
void noteOff(uint8_t channel, uint8_t pitch, uint8_t velocity) {
  MIDI.sendNoteOff(pitch, velocity, 1);
}
// コード送信
void chordOn(uint8_t pitch1, uint8_t pitch2, uint8_t pitch3) {
  MIDI.sendNoteOn(pitch1, 127, 1);
  MIDI.sendNoteOn(pitch2, 127, 1);
  MIDI.sendNoteOn(pitch3, 127, 1);
}
void chordOff(uint8_t pitch1, uint8_t pitch2, uint8_t pitch3) {
  MIDI.sendNoteOff(pitch1, 0, 1);
  MIDI.sendNoteOff(pitch2, 0, 1);
  MIDI.sendNoteOff(pitch3, 0, 1);
}

void noteOnOff(Event& e, uint8_t note){
  //uint8_t note = 60;
  if(isChordMode){
    if(e.type == E_TOUCH){ // note on
      Serial.print("E_TOURCH / ");
      Serial.println(e.objName());

      if(!strcmp(e.objName(), "c")){
          chordOn(60, 64, 67);
      } else if(!strcmp(e.objName(), "d")){
          chordOn(62, 65, 69);
      } else if(!strcmp(e.objName(), "e")){
          chordOn(64, 67, 71);
      } else if(!strcmp(e.objName(), "f")){
          chordOn(65, 69, 60);
      } else if(!strcmp(e.objName(), "g")){
          chordOn(67, 71, 62);
      } else if(!strcmp(e.objName(), "a")){
          chordOn(69, 72, 64);
      } else if(!strcmp(e.objName(), "b")){
          chordOn(71, 62, 65);
      }

    }  else {  // note off
      if(!strcmp(e.objName(), "c")){
          chordOff(60, 64, 67);
      } else if(!strcmp(e.objName(), "d")){
          chordOff(62, 65, 69);
      } else if(!strcmp(e.objName(), "e")){
          chordOff(64, 67, 71);
      } else if(!strcmp(e.objName(), "f")){
          chordOff(65, 69, 60);
      } else if(!strcmp(e.objName(), "g")){
          chordOff(67, 71, 62);
      } else if(!strcmp(e.objName(), "a")){
          chordOff(69, 72, 64);
      } else if(!strcmp(e.objName(), "b")){
          chordOff(71, 62, 65);
      }
    }
  } else {  // not isChordMode
      if(e.type == E_TOUCH){ // note on
        noteOn(0, note, 127);
      } else if(e.type ==  E_RELEASE) {    //note off
        noteOff(0, note, 0);
      }
  }

  //Serial.print(e);
  Serial.println(e.objName());
}

void event_btn_c(Event& e) {
  noteOnOff(e, 60);
}
void event_btn_d(Event& e) {
  noteOnOff(e, 62);
}
void event_btn_e(Event& e) {
  noteOnOff(e, 64);
}
void event_btn_f(Event& e) {
  noteOnOff(e, 65);
}
void event_btn_g(Event& e) {
  noteOnOff(e, 67);
}
void event_btn_a(Event& e) {
  noteOnOff(e, 69);
}
void event_btn_b(Event& e) {
  noteOnOff(e, 71);
}
void event_btn_C(Event& e) {
  noteOnOff(e, 72);
}


void event_btn_chord(Event& e) {
      if(e.type ==  E_RELEASE) {    //note off
        isChordMode = !isChordMode;
        const char *msg;
        if(isChordMode){
          msg = "Chord";
        }else{
          msg = "Note";
        }
        M5.Lcd.fillRect(       90, 0, 80, 50, BLACK);
        M5.Lcd.setTextColor(WHITE);
        M5.Lcd.drawString(msg, 120, 20, 1);
      }
      Serial.print("isChordMode: ");
      Serial.println(isChordMode);
}

// BLE-MIDI
// -----------------------------------------------------------------------------
// Device connected
// -----------------------------------------------------------------------------
void OnConnected() {
  isConnected = true;
  //digitalWrite(LED_BUILTIN, HIGH);
  M5.Lcd.setTextSize(1);
  M5.Lcd.setTextColor(WHITE, BLACK);
  M5.Lcd.setCursor(200, 18);
  M5.Lcd.printf("Connected.   ");
}

// -----------------------------------------------------------------------------
// Device disconnected
// -----------------------------------------------------------------------------
void OnDisconnected() {
  isConnected = false;
  //digitalWrite(LED_BUILTIN, LOW);
  M5.Lcd.setTextSize(1);
  M5.Lcd.setTextColor(WHITE, BLACK);
  M5.Lcd.setCursor(200, 18);
  M5.Lcd.printf("Disconnected.");
}
ボタンまわりで参考にしたのは以下のリンク。
M5Stack CORE2 UiFlowからArduino開発環境への移植 ~ タッチパネル × Faces(エンコーダ) × Bluetoothデバイス制御
でもって、今はこのへんも見ている。
[M5Stack Core2 for AWS] Arduinoで仮想ボタンを作成してみました
ESP32からM5Stack Core2へ。 応用へ第一歩 編 (3)
触覚フィードバック付き仮想ボタンを作ってみた
M5Stack Core 2のタッチまわりはこのへんにある。
M5Core2/src/utility/M5Button.h
あと、物理ボタンは、 if(M5.BtnA.wasPressed()) {} みたいな感じで拾えるそうだ。
Core2 BtnA、BtnB、およびBtnCがm5buttonライブラリで機能しない(英語のM5フォーラム)
あと、ボタンのラベルを途中で変える方法がわからなかったのだけど、ドキュメント見たら MyButoon..setLabel(“XXXX”)
みたいな感じでいけることがわかった(上記コードには未反映)。それから物理ボタンも
if(M5.BtnA.wasPressed()) {}
って具合に以前のモデルみたいに拾えることも判明(初期のライブラリでは対応してなかった模様)。いろいろ調べることが満載だ。
(追記)続き書いた。M5Stack Core 2でBluetooth MIDIキーボードその2

コメント